


Today I’m sharing with you a look inside my photo editing routine. I’ve done this post before, but I wanted to do an updated version now that I have a lot more experience and knowledge with playing with Photoshop and all it has to offer. Warning: this is going to be a photo-heavy post to help explain everything! I also have a giveaway at the end of the post, go check it out!

Above is the original photo. For this post, I’m using Adobe Bridge CS6’s Camera Raw function to edit my photos. I usually use Bridge for editing and then sometimes I’ll use one of A Beautiful Mess’s photoshop actions from the Fresh Collection for a final touch. I shoot every photo in Camera Raw. (I can do another post later on this if you all would like, but here’s a more in-depth explanation on why you should shoot in raw vs. jpeg.)

1) I started by increasing the exposure by +.65 to make the photo lighter. This is a step that a lot of people overuse, so be careful about your exposure usage!
 2. I increased the contrast by +50 to fix the fade that occurred when I lightened the photo. This draws out the dark tones and the light tones in the photograph, and you can tell it made a huge difference just in one step.

3) I decreased the highlights by -8. I shot this photo in direct sunlight, so I had to find a way to take out the glare caused by the harsh lighting.

4) I decreased the shadows by -28. I say that I’m decreasing them because I’m referring to the sliding scale, but I’m actually making them more contrasted by drawing out the shadows. You can see the difference when you look at her hair.

5) I increased the whites by +18. This isn’t making the whole photograph lighter like exposure, instead, it makes the whites crisper and sharper.

6) I decreased the blacks by -18. This is the same process with the shadows–it’s not actually decreasing them, it’s drawing out the black tones in the photo to make it a lot richer.

7) I increased the vibrance by +51. This is the step I messed around with the most to be sure it was just right, because it’s so easy to overdo it! Notice that I used vibrance and NOT saturation for this photo. Here’s why.


Look at the difference between these two photos. The one on the left looks like your elementary-aged cousin edited this on Picmonkey. Her skin is way too orange, and there’s no way her hair is that yellow. The one on the right, while still a little overdone, is much better. Her skin tone is even and looks natural, but the background is still rich and vibrant. The key here is using saturation (on the left) for landscapes and vibrance (on the right) for portraits. This is a huge mistake I always see people making, so please, for my sake, don’t do it.
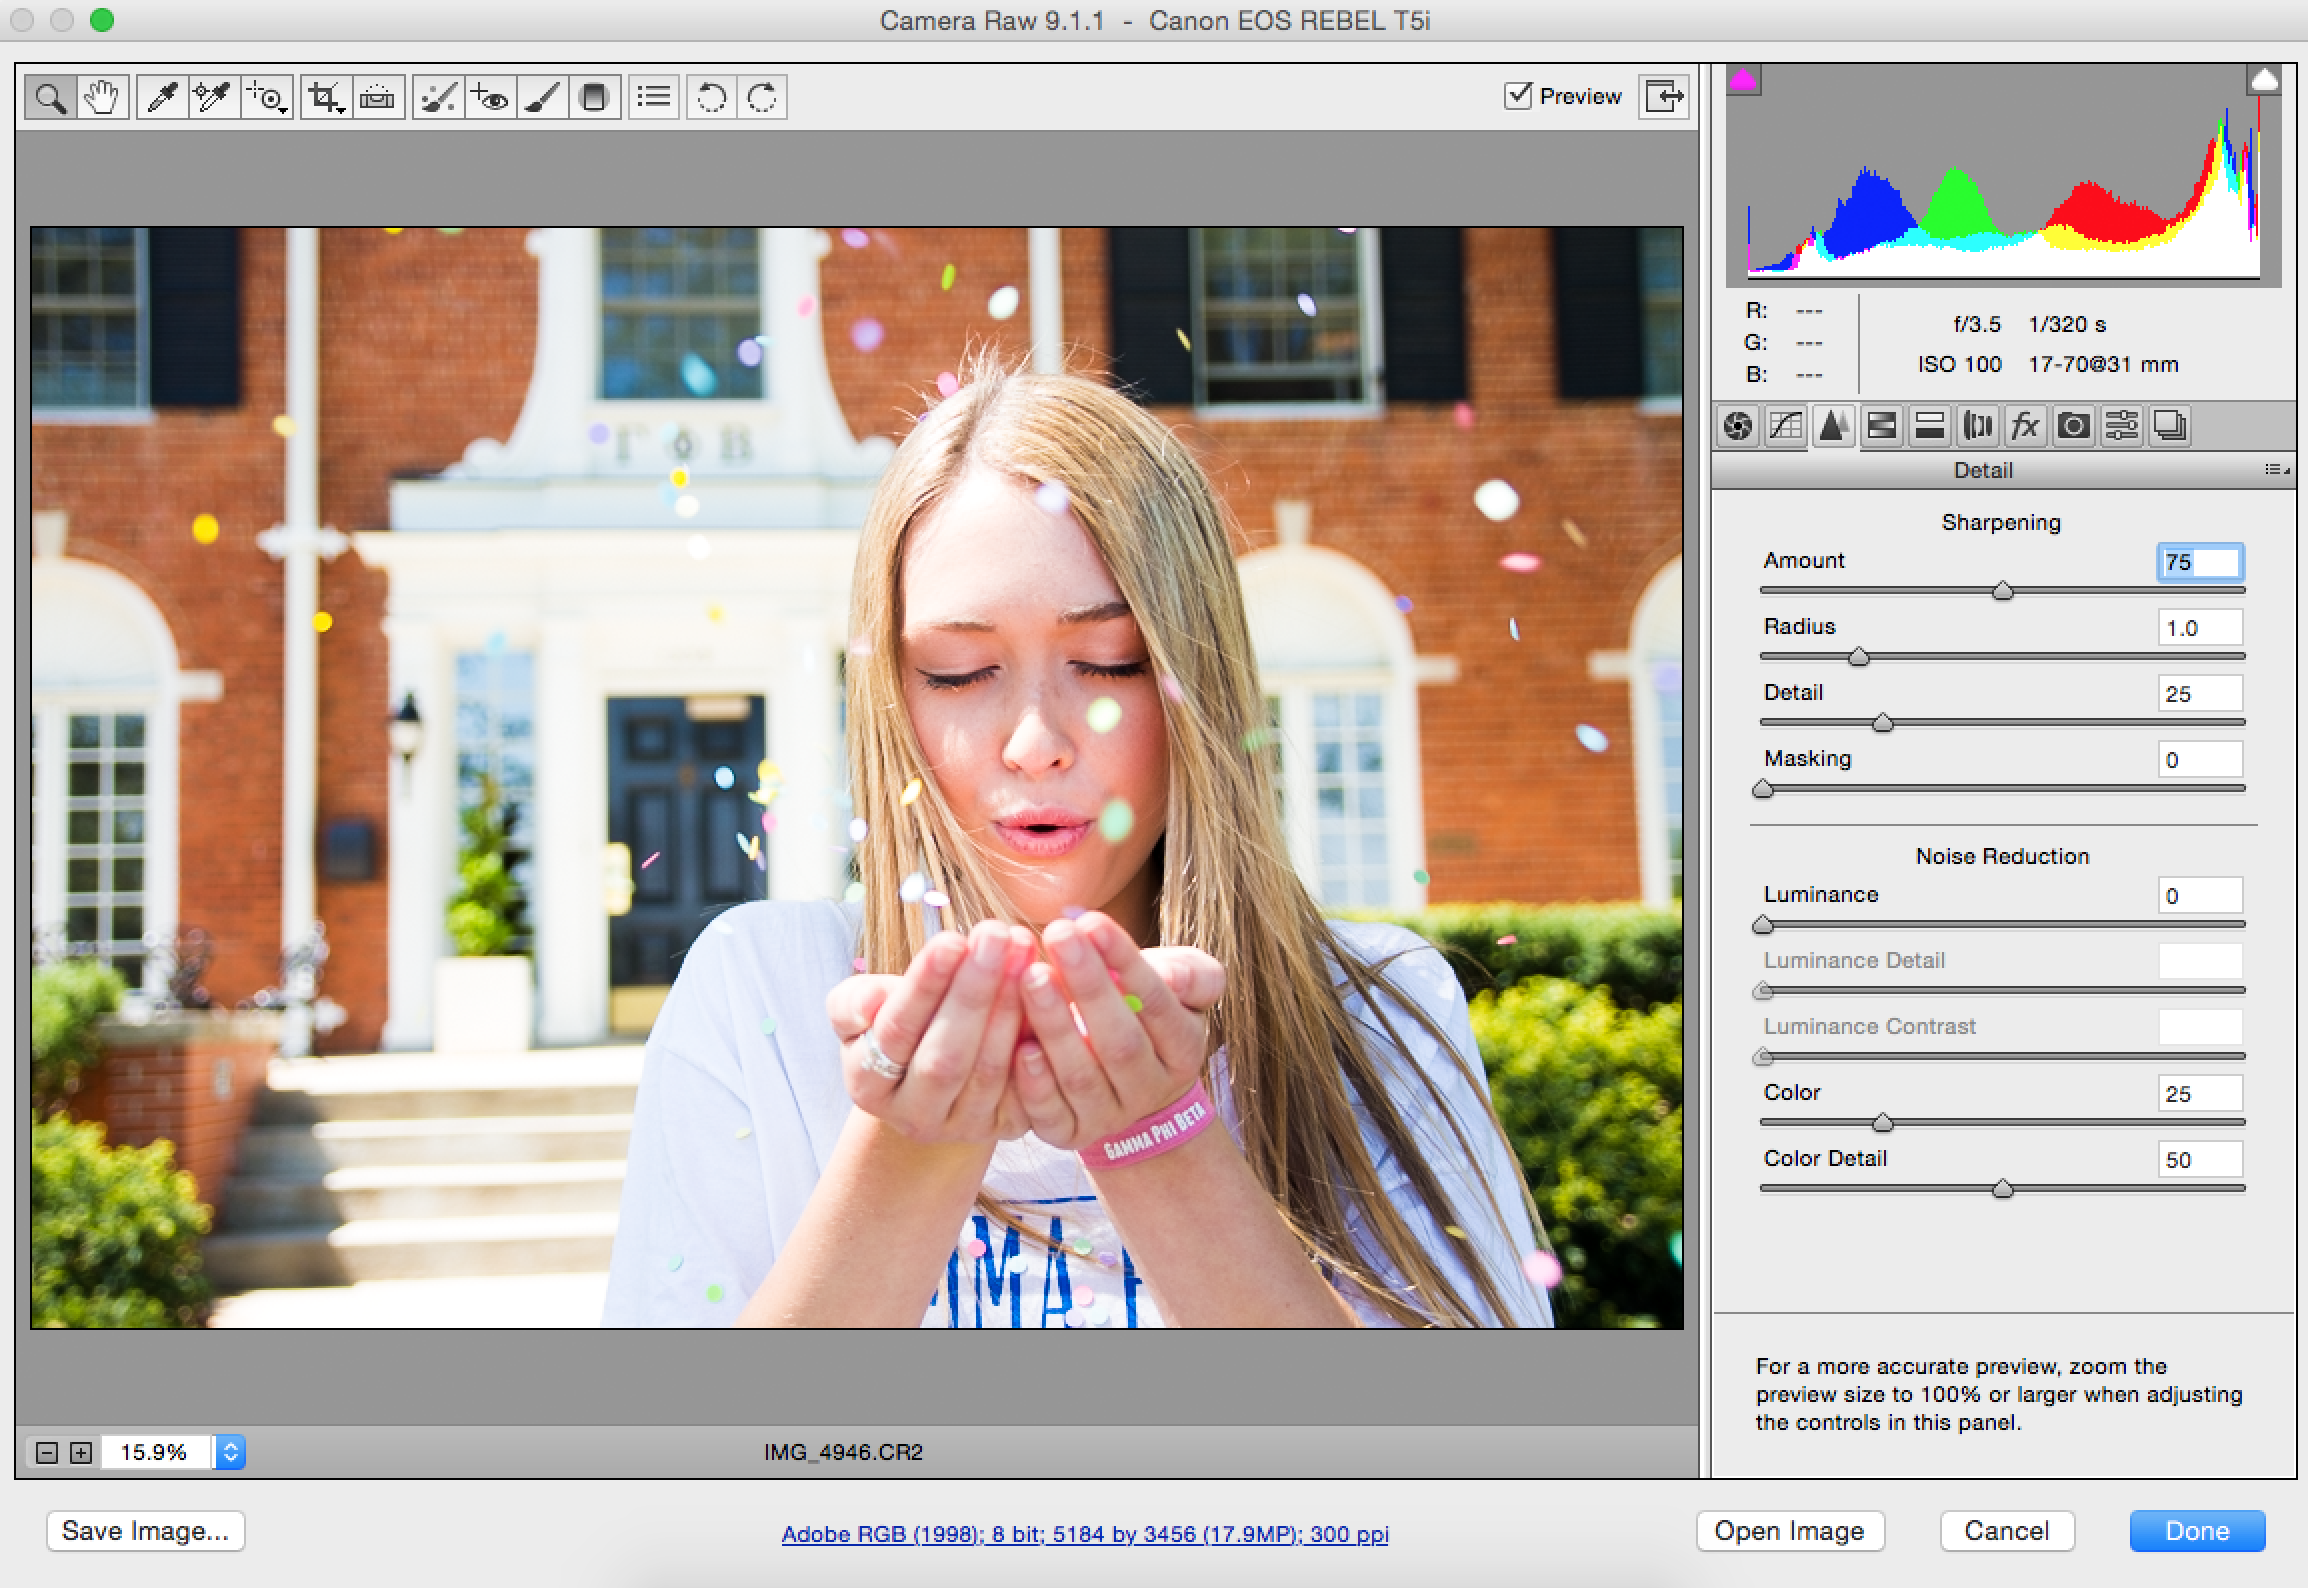
8) I increased the sharpening to +75. This feature is on the detail tab (third one) and I like to use it for portraits. (This is another classic example of landscape vs. portraits–when you’re editing landscapes, use clarity, when you’re editing portraits, use sharpening.)

9) Last step! I increased the vignetting by +5. This is another step I see being misused all the time. I wouldn’t recommend going past +10 for portraits, unless you’re going for a really dramatic look.

Here’s the final photo! This may seem like a lot of steps, but it didn’t take me long at all to go through and make my decisions in editing. It just takes practice to know what looks best on your photo.
You should go enter my giveaway for a sorority gift set on Instagram! Giveaway closes 4/27.
What’s your favorite photo editing tool?
xo, Hannah


1 Comment
Very informative and interesting Hannah.