Andrew Kuttler | Inside the Insta

Today I’m sharing an interview with Andrew Kuttler, a designer and photographer with over 66k followers on Instagram. He actually went to my college, the University of Kansas (rock chalk!), so this was the perfect opportunity to interview him.

What’s your favorite thing about Instagram?

As a designer, I love being able to share and curate a visual story. Instagram is the perfect platform to get yourself out there and show off your work. I look at it as a mini-portfolio.

What do you take your photos with?

I mainly shoot with my Ricoh GR for personal work. For Boomerangs and still videos I use my iPhone!

What three words would you use to describe your style on Instagram?

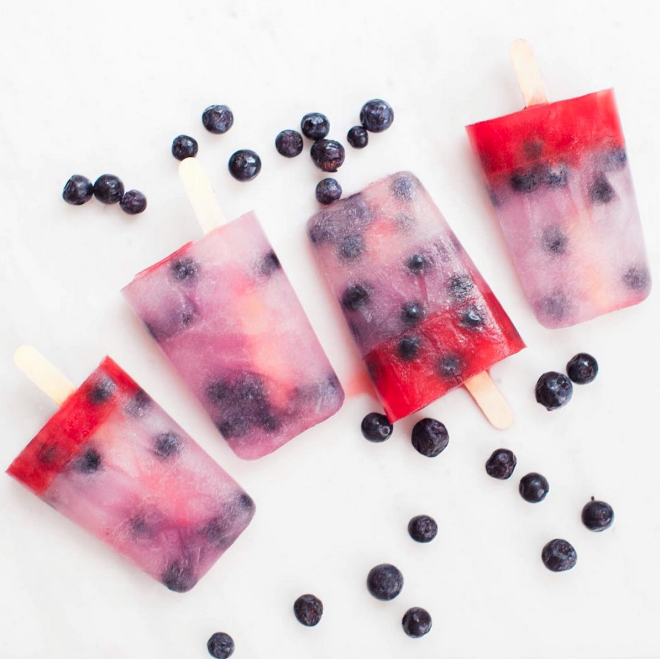
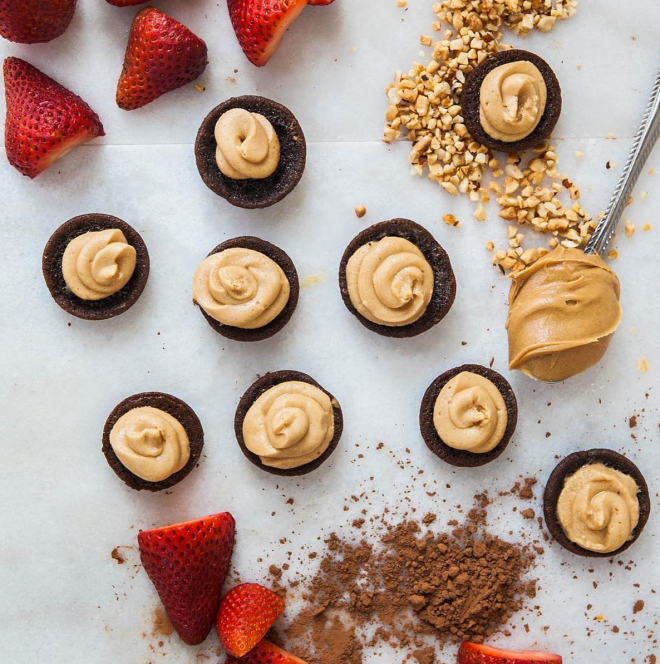
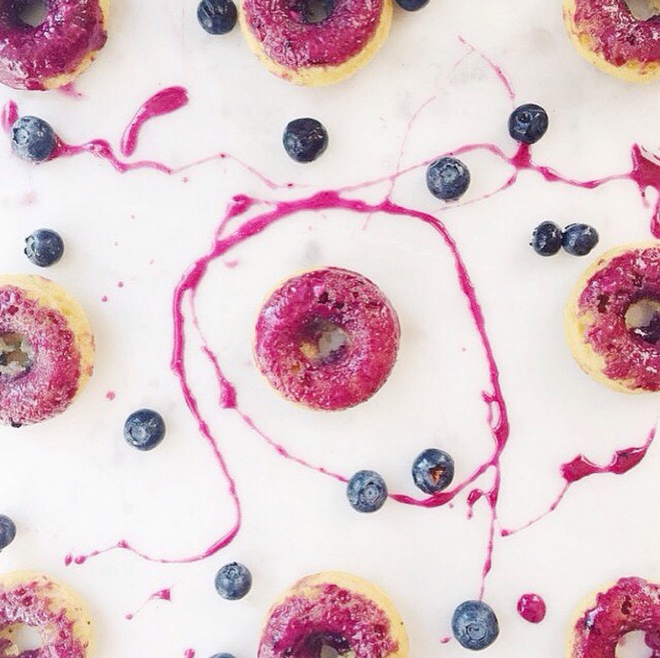
Colorful. Graphic. Surreal.

Who are three people on Instagram that you admire?

This changes all the time! So many talented photographers and designers are sharing their work on Instagram. Right now, I’m super inspired by…

@tashalakoz (Tasha Alakoz)

@chriscreature (Christopher Hainey)

@drcuerda (Daniel Rueda)

Where do you find your inspiration to take photos?

I’m a sucker for research and planning ahead. A lot of the locations I use for personal and client work are hours away, sometimes even a plane ride, so it’s important to put in the time to make sure you have a strong concept. I love hanging out at bookstores and going through photo books and magazines—they always provide great inspiration.

What was the most important thing you learned in college?

Be open! And that design can have many different applications. You never know where your path will lead and KU gave me an incredible foundation.

When did you first start collaborating with brands solely through Instagram?

3 years ago! I had been working at various ad agencies around Los Angeles and was really craving more creative freedom. A big brand reached out to me and after pulling out the project with them, I felt the confidence to go out and take a leap on my own.

What is your favorite brand collaboration that you’ve done so far?

I love clients that take me to new locations—I feel the most inspired and come alive creatively when I’m in some place that I’ve never been. I think working with Pixar at their campus in San Francisco for The Good Dinosaur and Inside Out was a big moment for me. I was surrounded by people doing the most amazing things and I’ll never forget the experience.

Thanks to Andrew for talking with me!

xo, Hannah

Continue Reading

Peyton Perry | Inside the Insta

Hi everyone! I’m so excited to share this edition of Inside the Insta with Peyton Perry today. I’ve followed Peyton for about two years now and still love her style—I think we could easily be friends in real life. If you look at my Inspiration board on Pinterest, it’s practically filled to the brim with her photos!

Peyton Perry | Inside the Insta


What do you take your photos with?
I shoot with my iPhone 6 or Canon EOS 6D.

I love your photo style! How do you edit the photos that go on your feed?
I’ve used various apps including Afterlight, VSCOcam, Snapseed, and A Color Story. Lately I’ve been using Adobe Lightroom Mobile—it’s amazing!

What’s your favorite thing about Instagram?
I love how Instagram allows me to see the world through infinite different lenses. I see how others interpret things, express themselves, and are often working to make the world a more artful place.

What do you center your photos around?
I try to center my photos around things I really love that can show the rest of the world how my brain works. I think, “What can Peyton Perry offer to the world today?” then I keep my eyes open and see what the world has to offer!

What three words would you use to describe your style on Instagram?
Clean, fun, unexpected.

Who are three people on Instagram that you admire?
@designlovefest: I loved Bri Emery’s style for…forever! I love how she’s taken Instagram and made it her own.

@geronimoballoons: Jihan is someone I got to meet and become friends with because of Instagram. She really views the platform as an opportunity to share art, make you laugh, and help you feel less alone. I think we can all relate to a few #jihanistheworst-isms. I truly think Jihan is one of the most talented, creative, and kind geniuses of our generation.

@ohhappyday: Jordan Ferney GETS IT. When others zig, she zags…just because that’s who she is! I love seeing what she creates and all the inventive photos she shares from her party shop.

Where do you find your inspiration to take photos?
I think my inspiration comes from where I see good in the world. Good doesn’t mean happy and fluffy all the time, sometimes it means honesty. I try to keep my eyes open, constantly looking and my ears constantly listening. You can find good anywhere if you’re looking with the right mindset. I also love “cool hunting.” I’m inspired by things that aren’t right in front of your face—things you have to search for.

How long do you usually take to set up a photo?
I give myself a mental time limit and if I’m spending too much time on a photo, I abandon it. It is INSTAgram, after all. The time I spend on a photo varies but I’m always very meticulous with checking that it’s exaaactly what I want before I post it. I’d say I spend a collective total of 15 minutes max on a photo.

Would you say you stick to a certain color scheme for your photos?
I’ve always stuck to bright and colorful because that’s what I know and love. I think it’s because I grew up in a city where color is celebrated in its culture. Lately I’ve been on a pink kick. By searching for pink to include in every photo, it has established a signature I love. It not only forces me to be creative, but it raises the bar for my work.

Square crop or full size, and why?
Depends on the photo, always. I do love how you can post full size (especially the beautiful look of full size portraits) but squares are another creative restraint that forces me to be creative amongst certain parameters.

If you’re not following Peyton already, be sure to swing over to her Instagram and give her a follow for constant creative inspiration!

Who should I feature next on Inside the Insta?

xo, Hannah

Continue Reading

Parabo Press is a Photographer’s Dream

I’ve been a photographer since I was about seven. Back then, my camera was a disposable Kodak and CVS was my printer of choice. I have scrapbooks filled with pictures from summer camp, holidays, etc.

I’ve always been the kind of person that likes to print my photos. Now that we live in a digital age, I realize the importance of printing photos and not just keeping them on my phone or my computer!

Parabo Press is my favorite printer I’ve found so far for high-quality prints. They were generous enough to let me test out some of their products. If you read to the bottom, you can find a coupon code for free prints!

Even though these came all the way from Mumbai, the shipping wasn’t expensive and they were packaged really well so that nothing was bent. Plus, the boxes are super cute!

Parabo Press | Hannah With a Camera

I got the classic square prints, their most popular product. I upgraded to the 5.5″ size and absolutely love them–the color definitely matches what’s on my screen and the matte finish is gorgeous. The paper is thick too, so it doesn’t bend or tear easily.

img_8486

I used the Pon Pins to secure these to my closet door in my room. These pins are genius- they don’t poke a hole through your photos; instead, they have a round circle clip you just slide the photos into.

img_8496

I also got their magnetic photo rope (another genius idea)! This comes with super-strong magnets and a rope to stick your photos to without ruining the photograph itself. It’s really long (58″) and I have it displayed by my bed for now, but I’m trying to figure out how to hang it on my wall.

img_8497

img_8502

You’ve probably noticed a theme of my dogs here…which is why I couldn’t resist trying out a more unique item, their Risograph prints. These are 11″ x 16″ and come in neon pink, blue, teal, or neon orange.

img_8508

These prints are such a fun way to show off your photos. Hint: make sure your photo has higher contrast than normal when you print them. It makes a huge difference!

img_8509

I absolutely love Parabo Press and all their printing options! They gave me a coupon code for my readers: HANSQ. If you’re a first-time customer, this gives you a free set of 25 Square Prints (the first ones pictured) and all you have to do is pay shipping. You can do it online or through the app they have!

Let me know if you try them out-I’d love to see what you print!

xo, Hannah

Thank you to Parabo Press for sponsoring this post.
Continue Reading

Five Common Photography Mistakes and How to Fix Them

5 Ways You're Taking Photos Wrong | Hannah With a Camera

I’ve been actively shooting photos for about six years, since eighth grade. However, I’ve had an interest in photography for way longer! If you go through my desk drawers and old scrapbooks, you can find photos from a disposable camera from Girl Scout camp, church camp, and family vacations. (I recently found a hilarious posed shoot with my American Girl dolls…) Over the years, I’ve learned a lot of tricks about photography and composition. You can read more of my posts about photography here! One of the best things about taking photos for so long means that I’ve made several mistakes and learned from them! Here are the top five mistakes that I’ve made and have learned from.

5 Ways You're Taking Photos Wrong | Hannah With a Camera

1. You’re still shooting in auto.

Five Ways You're Taking Pictures Wrong | Hannah With a Camera

I see so many people that buy a DSLR (a camera that can change lenses, not just a point-and-shoot) in an attempt to learn photography, but they only keep it on auto mode. This is probably the biggest mistake you can make if you’re trying to learn! If you’re not willing to make the full leap and commit to manual mode, you have two options: Av or Tv mode.

Av/A mode, or aperture priority, will help you learn how to control the depth of field. This is the trick to give you that ‘professional’ blurry background that everyone wants. Tv/S mode, or shutter priority, will help you learn how to control the movement in your photos. For example, if you’re taking photos of athletes, this will let you keep them in focus instead of making them blurry once they move out of the screen. After you conquer those two methods, you can advance to mastering manual mode!

Solution: Shoot in Av, Tv, or manual mode.

2. You don’t take advantage of your focal points.

Five Ways You're Taking Pictures Wrong | Hannah With a Camera

If you think you’ve figured out manual mode or Av mode, then you’ve probably figured out how to blur the background and get that desired bokeh. However, your photos are always out of focus–and you can’t figure out why. To pinpoint focus every time, you need to select a focal point on your DSLR. For Canons, you can do this by pressing the +/zoom in button, and a screen that says ‘AF point selection’ will pop up. Then you can use the dial to change where you want your camera to automatically focus. For portraits, you’ll want to always focus on the eye nearest to you. When you look through the viewfinder of your camera and hold the shutter halfway down, you can see the red dot of the focal point you selected and move your camera or focal point accordingly.

Solution: Select your focal point to nail focus every time.

3. You’re shooting straight into the sun.Five Ways You're Taking Pictures Wrong | Hannah With a Camera

I always see people getting excited about going out to do a photoshoot, then taking all their photos in the middle of the day when the sun is at its brightest, making all their photos either overexposed or extremely shadowy. An easy fix to this is to shoot at golden hour. This is a common term in photography that refers to the time of day when the sun is coming up or going down. However, I get that photoshoots are hard to coordinate–so if you’re taking pictures in the middle of the day, find the shade or cloud that doesn’t make your light so harsh.

Solution: Change the time of day

4. You’re always taking photos from eye-level.

Change up your perspective every once in a while! You can go for a bird’s eye view, shoot from the ground, and so much more. For the first photo below, I got down and laid on my stomach to get the right perspective and be on eye-level with my subject. For the second one, I stood above her and shot down. See the difference?

Five Ways You're Taking Pictures Wrong | Hannah With a Camera Five Ways You're Taking Pictures Wrong | Hannah With a Camera

Solution: Change your perspective and move around your subject.

5. You’re following all the rules.

I know, this contradicts probably everything you’ve ever read…but the best part about art is that it’s all about creating your own style. After you learn how to use the rule of thirds, then feel free to shoot symmetrically to create an interesting style. After you learn how to use light ‘correctly,’ then use the shadows from your window to experiment with how light plays across your subject. There are so many options out there, so one of the best ways to learn photography is to just get out there and practice!

Feel free to ask any questions in the comments, I love sharing my knowledge about photography!

xo, Hannah

Continue Reading

Adobe Bridge Camera Raw Editing Tutorial + GIVEAWAY

feature image

Today I’m sharing with you a look inside my photo editing routine. I’ve done this post before, but I wanted to do an updated version now that I have a lot more experience and knowledge with playing with Photoshop and all it has to offer. Warning: this is going to be a photo-heavy post to help explain everything! I also have a giveaway at the end of the post, go check it out!

Adobe Bridge Camera Raw Editing Tutorial

Above is the original photo. For this post, I’m using Adobe Bridge CS6’s Camera Raw function to edit my photos. I usually use Bridge for editing and then sometimes I’ll use one of A Beautiful Mess’s photoshop actions from the Fresh Collection for a final touch. I shoot every photo in Camera Raw. (I can do another post later on this if you all would like, but here’s a more in-depth explanation on why you should shoot in raw vs. jpeg.)

Adobe Bridge Camera Raw Editing Tutorial

1) I started by increasing the exposure by +.65 to make the photo lighter. This is a step that a lot of people overuse, so be careful about your exposure usage!

Adobe Bridge Camera Raw Editing Tutorial2. I increased the contrast by +50 to fix the fade that occurred when I lightened the photo. This draws out the dark tones and the light tones in the photograph, and you can tell it made a huge difference just in one step.

Adobe Bridge Camera Raw Editing Tutorial

3) I decreased the highlights by -8. I shot this photo in direct sunlight, so I had to find a way to take out the glare caused by the harsh lighting.

Adobe Bridge Camera Raw Editing Tutorial

4) I decreased the shadows by -28. I say that I’m decreasing them because I’m referring to the sliding scale, but I’m actually making them more contrasted by drawing out the shadows. You can see the difference when you look at her hair.

Adobe Bridge Camera Raw Editing Tutorial

5) I increased the whites by +18. This isn’t making the whole photograph lighter like exposure, instead, it makes the whites crisper and sharper.

Adobe Bridge Camera Raw Editing Tutorial

6) I decreased the blacks by -18. This is the same process with the shadows–it’s not actually decreasing them, it’s drawing out the black tones in the photo to make it a lot richer.

Adobe Bridge Camera Raw Editing Tutorial

7) I increased the vibrance by +51. This is the step I messed around with the most to be sure it was just right, because it’s so easy to overdo it! Notice that I used vibrance and NOT saturation for this photo. Here’s why.

Look at the difference between these two photos. The one on the left looks like your elementary-aged cousin edited this on Picmonkey. Her skin is way too orange, and there’s no way her hair is that yellow. The one on the right, while still a little overdone, is much better. Her skin tone is even and looks natural, but the background is still rich and vibrant. The key here is using saturation (on the left) for landscapes and vibrance (on the right) for portraits. This is a huge mistake I always see people making, so please, for my sake, don’t do it.

Adobe Bridge Camera Raw Editing Tutorial

8) I increased the sharpening to +75. This feature is on the detail tab (third one) and I like to use it for portraits. (This is another classic example of landscape vs. portraits–when you’re editing landscapes, use clarity, when you’re editing portraits, use sharpening.)

Adobe Bridge Camera Raw Editing Tutorial

9) Last step! I increased the vignetting by +5. This is another step I see being misused all the time. I wouldn’t recommend going past +10 for portraits, unless you’re going for a really dramatic look.

Adobe Bridge Camera Raw Editing Tutorial

Here’s the final photo! This may seem like a lot of steps, but it didn’t take me long at all to go through and make my decisions in editing. It just takes practice to know what looks best on your photo.

You should go enter my giveaway for a sorority gift set on Instagram! Giveaway closes 4/27.

What’s your favorite photo editing tool?

xo, Hannah

Continue Reading

The Dogist

I’ve been a fan of the Dogist for a while now, and I’ve even started my own Instagram based off of his called Dogs of KU (follow it if you haven’t yet!). The Dogist is run by Elias Weiss Friedmann, a photographer based in New York that grew up with both a love of photography and dogs. He set out to photograph a dog a day in New York just when Instagram was taking off, and it’s grown from there.

The Dogist

I absolutely love his work and so when I heard his book tour was coming to KC, I knew I had to go. I went to go meet him with my parents and got his book as well. Being able to meet a photographer that I look up to was super cool and I got to show him my Dogs of KU Instagram as well.

The Dogist

The Dogist

The Dogist

The Dogist

If you don’t follow the Dogist yet, I definitely recommend it.

Thanks for reading!

**all photos pictured of dogs are taken by the Dogist

fixed monogram

Continue Reading

Inside The Insta with A Day In The Kitchen

Somehow I found Lauren’s instagram, A Day In The Kitchen, through someone else and I was immediately drawn in by her gorgeous photos. Then I did a little more research and found that she posted her own recipes..and that’s she’s only in middle school. How’s that for impressive?

A Day In The Kitchen-Inside The Insta

How did you get started with baking?

My mom (who passed away a year ago from cancer) is the one who made me start to enjoy food and love trying out new stuff and being in the kitchen, but I actually started wanting to have a bakery and have a blog/food account when I saw the show DC Cupcakes a few years ago!

Berry Lemonade Ice Pops
What’s your favorite part of baking/cooking? 

I love being able to be in the kitchen and try out new recipes and try new foods! Making cupcakes are high on the top of my list for favorite things to make! 🙂

Can you share your favorite recipe?

These were a big hit and one of my favorite desserts!

Mini GF Black Bean Chocolate Cupcakes with Peanut Butter Frosting

Do you take your own photos? If you do, how’d you learn photography?

Actually, my sister is a photographer and has taken some of the photos. She’s also taught me a little about how to take pictures so I have also taken some that are on my account!

Have you ever considered starting a blog?
I have! My sister has a blog and I have really wanted to start one! We have thought to do one in the future once I have a few more people following my account! I would love to start one! 🙂
Mini Poppyseed Donuts With Blueberry Glaze
Lauren currently has 675 followers on her still-growing account, and I’d say that’s definitely enough to start her own blog by now. I can’t wait to see what she has in store for the future!
Thanks for reading,
fixed monogram
Continue Reading

Faceless Portrait

As a student in AP Art this year, I’m putting together a portfolio to be submitted. One of the categories required is a concentration. For my concentration, I chose the topic ‘faceless portrait’ based off the National Geographic Your Shot challenge. (Side note–if you’re a photographer interested in getting prompts to expand your horizons, Your Shot is an awesome place to check out.)

hands6

I had taken this photo last year of my cousins’ grandpa. To some this may just seem like a photograph of hands, but when I showed my family members, they immediately knew who it was without any analysis of details. The mannerism that he holds of dignity and relaxation is unique to him and I didn’t need his face to show that.

7

This photo is another one of my favorites, taken of my dad at the Nelson-Atkins Museum here in Kansas City. This is called Glass Labyrinth by Robert Morris. Watch the aerial video of the opening day, it’s super cool! The way the glass reflects and intersects often creates an interesting illusion and this created a sort of mirror effect–real on one side, ghostly on the other.

IMG_5560

This photo was taken at a Sporting KC game of one of the fans in front of me. The way his hands are on his head and how his head is tilted back in frustration reminds me of something a coach or a father would do. While this position on an adult would be seen as typical, seeing on a child provides a humorous aspect.

This is possibly my favorite photo I’ve taken so far! I took it while serving food at a homeless shelter. What draws me to this photograph is how much you can tell about the people without seeing their expressions. You can tell that the man loves the little girl and that he’ll protect her. You don’t need a face to explain love.

original1

These photos are all unedited and I plan to share more in the future. Photography is one of my greatest passions and I love expressing myself through it. That being said, I recently did an interview with one of my favorite photographers and I’ll share that on the blog soon!

Thanks for reading,

fixed monogram

Continue Reading

Inside the Insta with Prep Avenue

prep avenue header

While I was researching people to interview for this series, Shannon from Prep Avenue was one of the first people I thought of! Her Instagram is always so bright and colorful. She’s one of those bloggers that has created a ‘look’ for herself and the pops of color and pink is always what comes to mind when I think of her. (Plus, she’s adorable. Come on.)

What do you take your photos with?

Honestly it depends where I am and what I’m taking a picture of! If I have my camera with me then I’ll probably take the picture with my camera (I have a Canon Rebel T3i); however, if I’m just out and about then I just use my iPhone!

I love how bright and colorful your photos are! How do you edit them?

Thanks! Most of the time I just use Photoshop on my computer and enhance the brightness.

What’s your favorite thing about Instagram as a blogger?

My favorite thing about Instagram as a blogger is probably the inspiration it provides. I randomly stumble upon a Instagram account that I become obsessed with and I love to see others perspectives on life! I also love seeing what people are doing on a day to day basis. It’s a great way to stay connected with so many people through fun pictures!

prep avenue insta pic 1

What do you center your photos around?

Honestly, nothing too specific! I try to stick to bright colors, pinks, yellows, oranges, and of course lots of navy.

What three words would you use to describe your style on Instagram?

Ooo that’s a hard one! Probably bright, whimsical, and preppy!

Who are three people on Instagram that you admire?

I’m obsessed with Notes_from_Monroe, Mackenzie Horan, and ParisInFourMonths.

prep avenue insta pic 2

Where do you find your inspiration to take photos?

Everywhere! I find a lot of inspiration from other Instagram accounts, Pinterest, and just life in general! Going to new cities and exploring new places also always brings me a ton of inspiration! And the moment I walk into a Kate Spade store, I always feel overly inspired with their bright and bold colors.

How long do you usually take to set up a photo?

This also depends on where I am. But probably no longer than 5-10 minutes! Sometimes it’s frustrating because I can’t find the right lighting but once I do it’s a super fast process!

                prep avenue insta pic 3 Would you say you stick to a certain color scheme for your photos?

I try too. Although sometimes I take a picture that doesn’t exactly fit into the color scheme but it’s just way too cute not to post! My most popular colors are definitely navy and hot pink though.

Square crop or full size, and why?

Square crop all the way! The worst feeling in the world is when you take an amazing photo and then you crop it down into a square and you can’t fit it all! It’s so much easier if you just start out with square crop.

Thanks for reading! Go follow Shannon on her Instagram and read her blog!

navy monogram

Continue Reading

Photography from A-Z

When I first started using my Mom’s DSLR as a freshman in high school, I was ridiculously overwhelmed. How was I supposed to know how to work anything? Now, as a senior, I’ve become much more acquainted with the manual setting on my camera and I can successfully navigate around the controls. I took several photography classes to learn, but the internet is a great place to start too! I’ve rounded up some of the best tutorials online to learn everything about stepping into manual.

the a-z's of photography

A- Aperture (a guide about f/stop)

B- Bokeh (how to get a soft background)

C- Canon (the seven best entry-level Canons)

D- Diffuser (a DIY flash diffuser)

E- Editing (editing for beginners)

F- F/Stop (free download of a chart explaining f-stop)

G- GIMP (free photo editing program similar to Photoshop)

H- Headshot (tips on taking the perfect headshot)

I- iPhone (10 iPhone tips and tricks)

J- Jargon (explaining the language of photography)

K- Kelvin (understanding how white balance and temperature works)

L- Lenses (upgrading after you’ve gotten used to your kit lens)

M- Metering (intro to metering and focus)

N- Noise (avoiding the grain in pictures)

O- Outdoor Lighting (tips on improvement)

P- Panning (how to pan in pictures)

Q- Quotes (50 quotes about photography)

R- Reflector (DIY reflector tutorial)

S- Shutter Speed (intro to shutter speed)

T- Tilt Shift (creating tilt-shift photos in post processing)

U- UV Filters (what to know about ultraviolet filters)

V- Vibrance (the difference between vibrance and saturation)

W- Website (the best websites to learn from)

X- eXposure (how to nail exposure)

Y- You (photography projects that you can do)

Z- Zoom (a guide to what the mm means on your lens)

Thanks for reading!

navy monogram

Continue Reading